Test Your Apps and Services with GitHub Actions Quickly and for Free

This article is for people new to NixOS and its testing tools. Even though we have talked about NixOS integration tests before, this time we’re making it easy for beginners. We’ll show you how to use the NixOS test driver with a simple project. This is a hands-on article, meaning we’ll go through the steps together. You’ll learn by doing, which is a great way to see how NixOS can help with your projects.
If you want to know more about certain topics, like setting up a NixOS container or running a NixOS VM, we’ve included links to other articles that go into more detail.
Example Test-Project with GitHub CI
To illustrate the utility of the NixOS integration test driver for our projects, let’s build a minimal example in the following steps:
- We write a minimal Python “Echo” Server that listens on a TCP port and sends back what it received.
- To make it run as a systemd service in NixOS, we create a NixOS module.
- We test our new service in a simulated end-user scenario using the NixOS integration test driver.
- Finally, let’s also run the tests on GitHub Actions.
While following the steps, please check out the example project from GitHub:
https://github.com/tfc/nixos-integration-test-example
In the article, we highlight only the most important files.
You will find the files that we touch in the repository’s flake.nix file and
within the echo folder.
Step 1: Build the Python app
When we test real-life applications, they are built in some language and later provide some binaries with dependencies, that need to run with a certain configuration.
In our simplified scenario, we write a Python application that acts as a TCP echo server:
# file: echo-server.py
import socket
import sys

HOST = ""

try:
    PORT = int(sys.argv[1])
except:
    print("Please provide a port number on the command line")
    sys.exit(1)

with socket.socket(socket.AF_INET, socket.SOCK_STREAM) as s:
    s.bind((HOST, PORT))
    s.listen()

    while True:
        conn, addr = s.accept()
        with conn:
            while True:
                data = conn.recv(1024)
                if not data:
                    break
                conn.sendall(data)
This application listens on a configurable port, accepts connections, and for every connection, it sends back what it receives. Let’s check out what it looks like when we run it manually:
# Run server in the background
$ nix shell nixpkgs#python3 --command python3 echo/echo-server.py 1234 &
[1] 625292

# Connect with netcat as a client and send something
$ echo "hello, world!" | nc -N localhost 1234
hello, world!
$ echo "foo, bar!" | nc -N localhost 1234
foo, bar!
Of course, real-life applications are typically not run with nix shell.
They consist of many source files and build instructions that need to be
processed with additional complex build and dependency management tooling.
The nixpkgs documentation explains
how to build real Python projects,
but as this article concentrates on NixOS modules and testing, our one-file app
should suffice.
Step 2: Create the NixOS Module
A running NixOS system manages its services and their dependencies with systemd. So let’s describe our app as a service with the native NixOS facilities.
Services in NixOS are usually configured in a way that users can write configuration code like this:
# Someone's NixOS configuration file
{
  # ...

  services.myservice = {
    enable = true;
    someSetting = "bla";
  };

  # ...
}
Setting services.myservice.enable to true automatically installs and
configures the service.
Each service typically comes with its own app-specific settings.
A file in which such settings are written down is then called a module. Modules can include each other to compose a bigger configuration structure.

Where do configuration attributes like services.myservice.enable and others
come from?
When a NixOS configuration is evaluated, it gets an implicit import list of
hundreds of NixOS modules that have been written by the NixOS community.
These provide configuration attributes for all kinds of services.
Let us now write our own and add it to the imports:
# file: echo-nixos-module.nix
{ config, pkgs, lib, ... }:
let
  cfg = config.services.echo;
in
{
  options.services.echo = {
    enable = lib.mkEnableOption "TCP echo as a Service";
    port = lib.mkOption {
      type = lib.types.port;
      default = 8081;
      description = "Port to listen on";
    };
  };

  config = lib.mkIf cfg.enable {
    systemd.services.echo = {
      description = "Friendly TCP Echo as a Service Daemon";
      wantedBy = [ "multi-user.target" ];
      serviceConfig.ExecStart = ''
        ${pkgs.python3}/bin/python3 ${./echo-server.py} ${builtins.toString cfg.port}
      '';
    };
  };
}
This NixOS module produces two new configuration attributes:
services.echo.enable: It lets users enable the service.services.echo.port: It lets users change the TCP port the service is listening on.
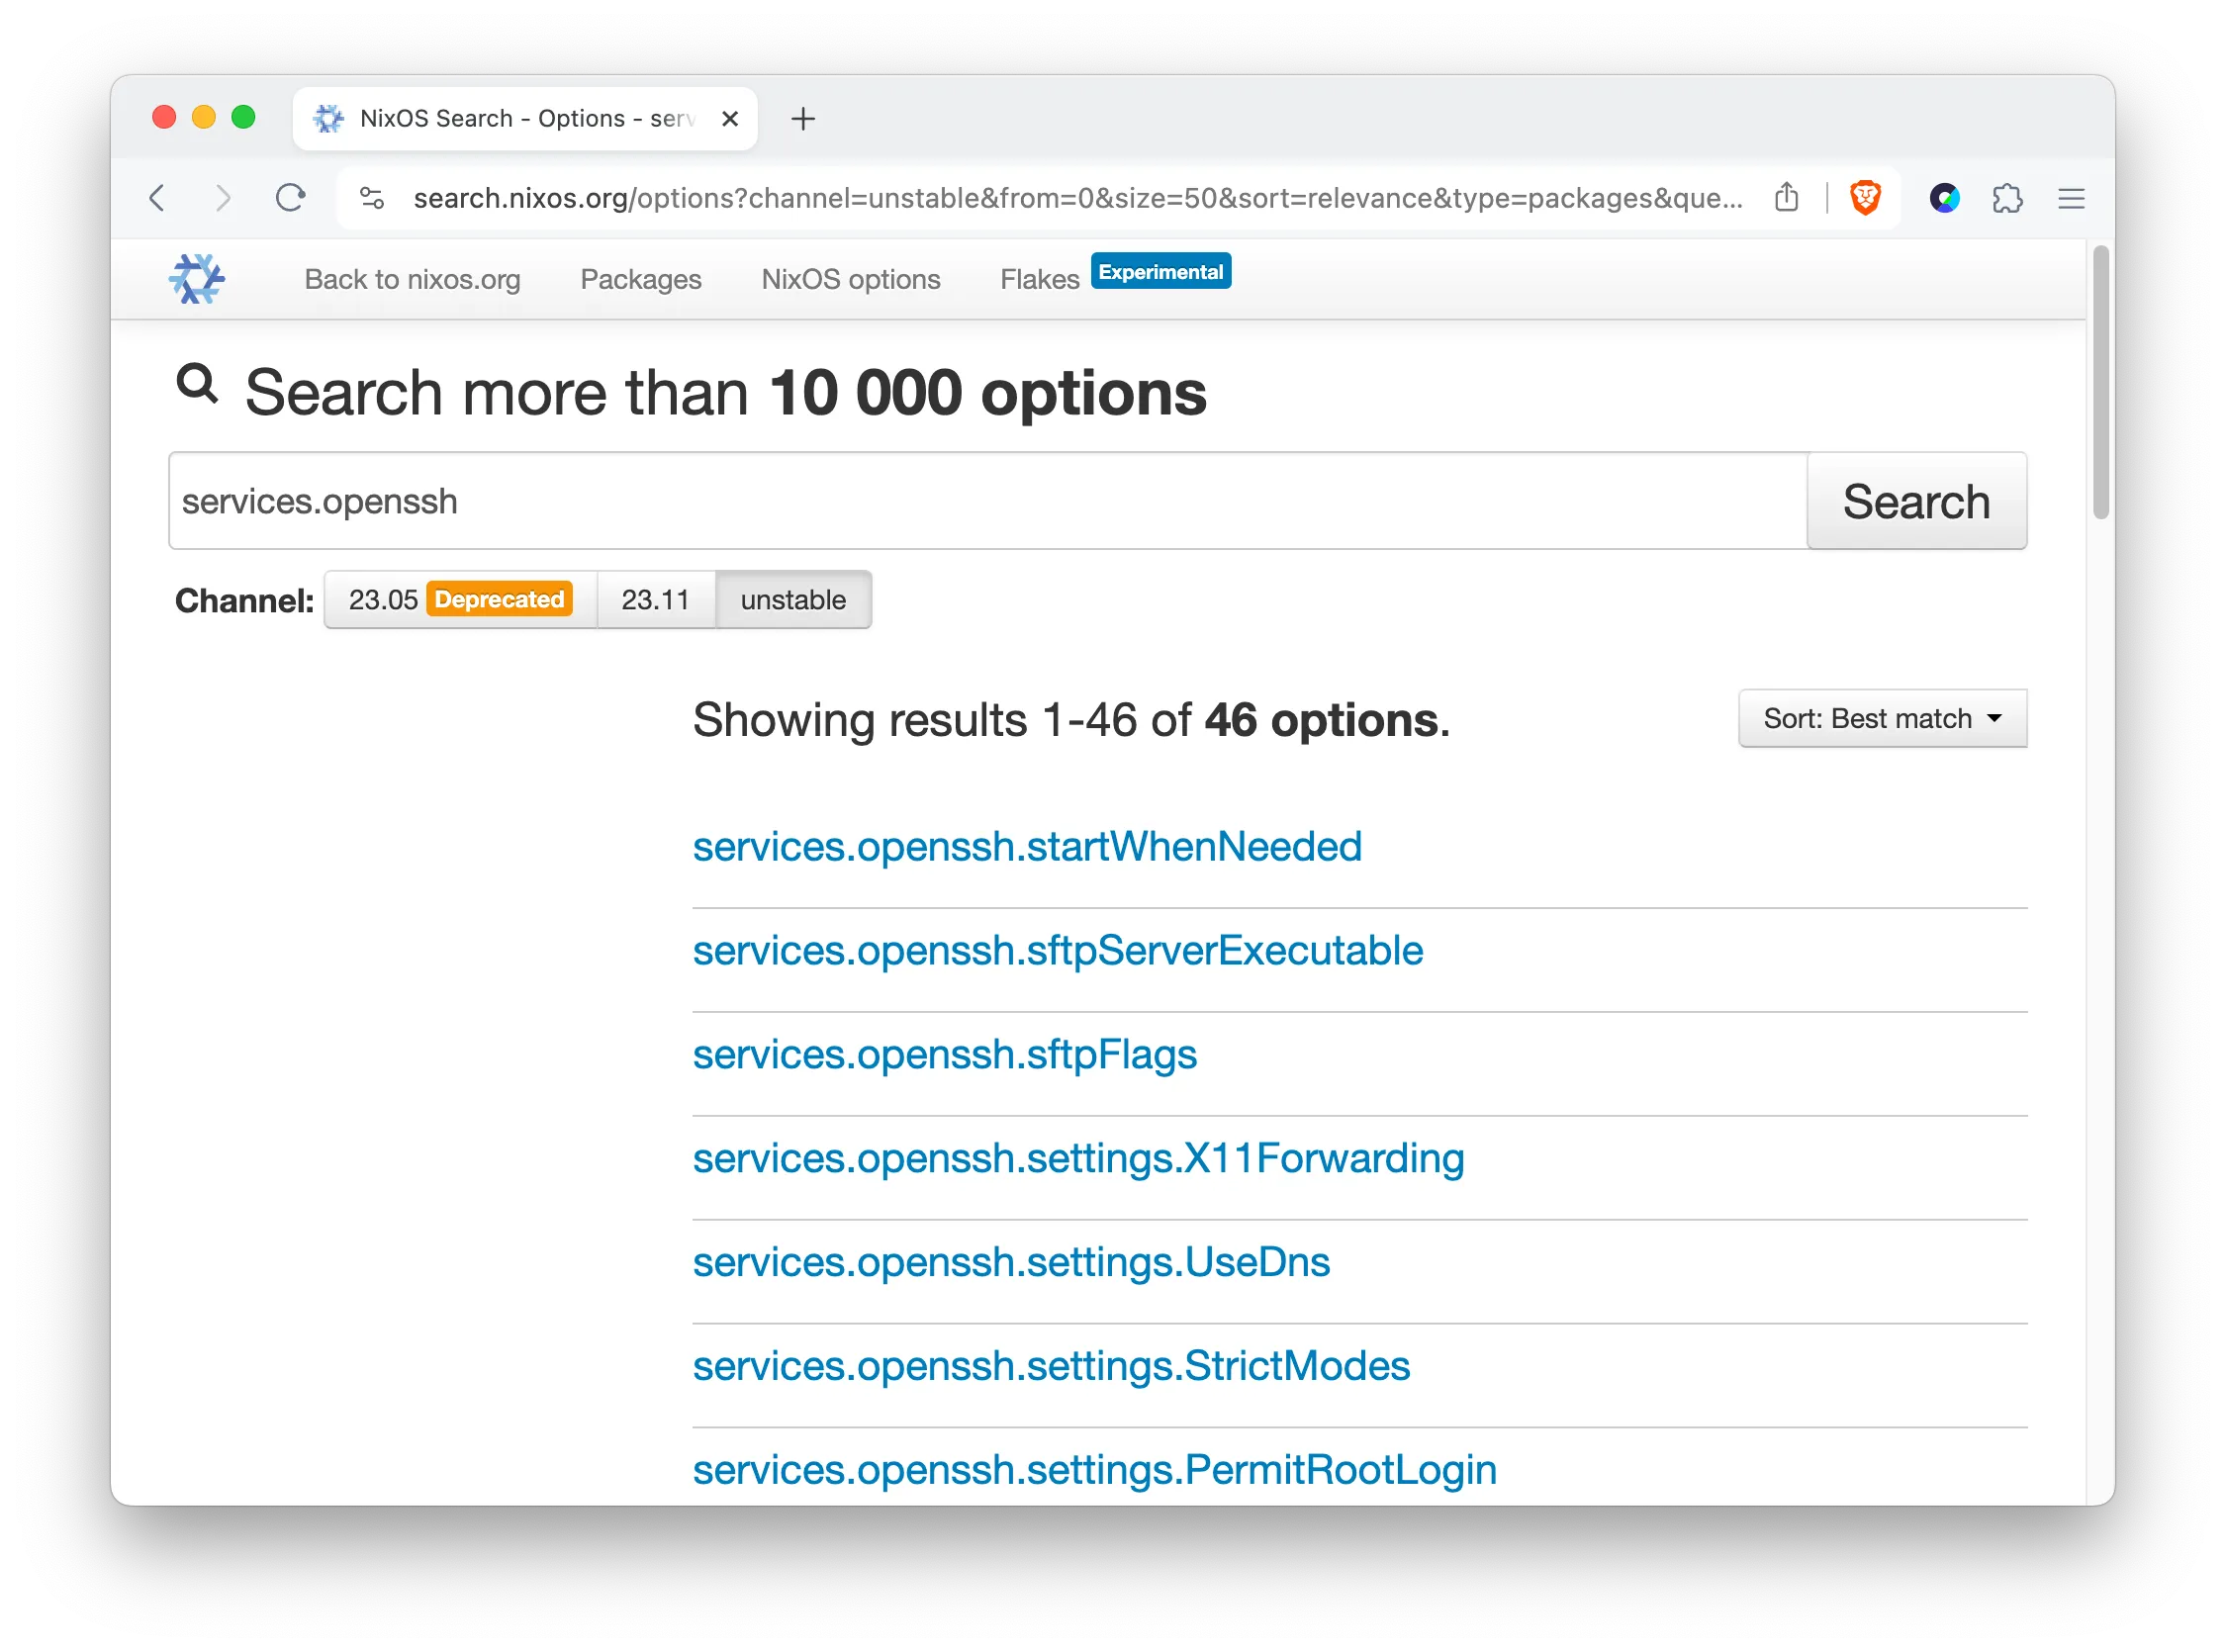
In the upper half of the file, inside the options part, these attributes are
declared with name, type, example, default, and a bit of documentation
(The content of search.nixos.org is automatically generated from such
information).
The bottom half describes the changes in the system configuration when these
attributes have been used.
We are not going into detail here
(in the Nixcademy classes, we do!), but you can always
look up the attribute paths on search.nixos.org.
We can see that the ExecStart line (known from
systemd unit files,
which will be generated from our description), the service runs the Python
interpreter on our script and provides the TCP port number on the command line.
Note how we could even run different Python interpreters in different services without having to use containers for this kind of separation.
An end-user NixOS configuration that uses this service can look like this:
{ config, ... }:
{
  # Need to import this module first before we use it
  imports = [ ./echo-nixos-module ];

  # Configure the actual echo service
  services.echo = {
    enable = true;
    port = 4321; # optional, as 1234 would be the default value
  };

  # Firewall is active by default - open the port
  networking.firewall.allowedTCPPorts = [
    config.services.echo.port
  ];
}
One very nice detail is that configuration attributes in NixOS modules can not only be set but also be consumed by other modules. We consume the port number of the echo service in the firewall part.
To improve the user experience, we could write an option attribute like
services.echo.openFirewallso the user does not have to do that themselves. This is part of one of the exercises in the Nixcademy classes where we learn how to architect and implement good NixOS modules, which regularly leads to many “aha!” effects!
The module is finished. We could now use it to deploy our service on bare-metal machines, VMs, containers, and so on. If you’re interested in that, have a look at a few of our other articles:
For the rest of the article, we concentrate on testing our service.
Step 3: Test It
To create a meaningful end-to-end user scenario for testing our service, let’s create a network with two machines:
- A host called
serverwhich runs our echo service - A host called
clientwhich uses the service
In the test, we boot these machines up and let the client use the service.
Real-life products are a bit more complex. In part 1 and part 2 of our article series on the NixOS integration driver, we showcased some more complex examples.
Let’s create a new file
test.nix in our project folder
and describe both the configuration of the machines and the actual test script:
# file: test.nix
{
  name = "Echo Service Test";

  nodes = {
    # Machine number one: The Echo Server
    server = { config, pkgs, ... }: {
      imports = [
        ./echo-nixos-module.nix
      ];

      services.echo.enable = true;

      networking.firewall.allowedTCPPorts = [
        config.services.echo.port
      ];
    };

    # Machine number two: A network client
    client = { ... }: {
      # We leave the config empty as test VMs have sensible defaults
    };
  };

  # The test should take only a few seconds. Don't clog the CI if it hangs.
  globalTimeout = 30;

  testScript = { nodes, ... }: ''
    ECHO_PORT = ${builtins.toString nodes.server.services.echo.port}
    ECHO_TEXT = "Hello, world!"

    start_all()

    # Wait until the VMs/services reach their operational state
    server.wait_for_unit("echo.service")
    server.wait_for_open_port(ECHO_PORT)

    client.systemctl("start network-online.target")
    client.wait_for_unit("network-online.target")

    # This is our actual test: Send "Hello, World" and expect it as an answer
    output = client.succeed(f"echo '{ECHO_TEXT}' | nc -N server {ECHO_PORT}")
    assert ECHO_TEXT in output
  '';
}
The upper half of the file describes the two VMs in the typical declarative
NixOS style.
Both the server and client attributes are filled with NixOS modules which
could have been used on production setups, too.
This way we can make our integration tests as real-life-like as possible without
duplicating much code and configuration.
The lower half describes the imperative steps that the test should perform. We start the VMs, wait until they are operational, and then run the actual test stimulation and check the results.
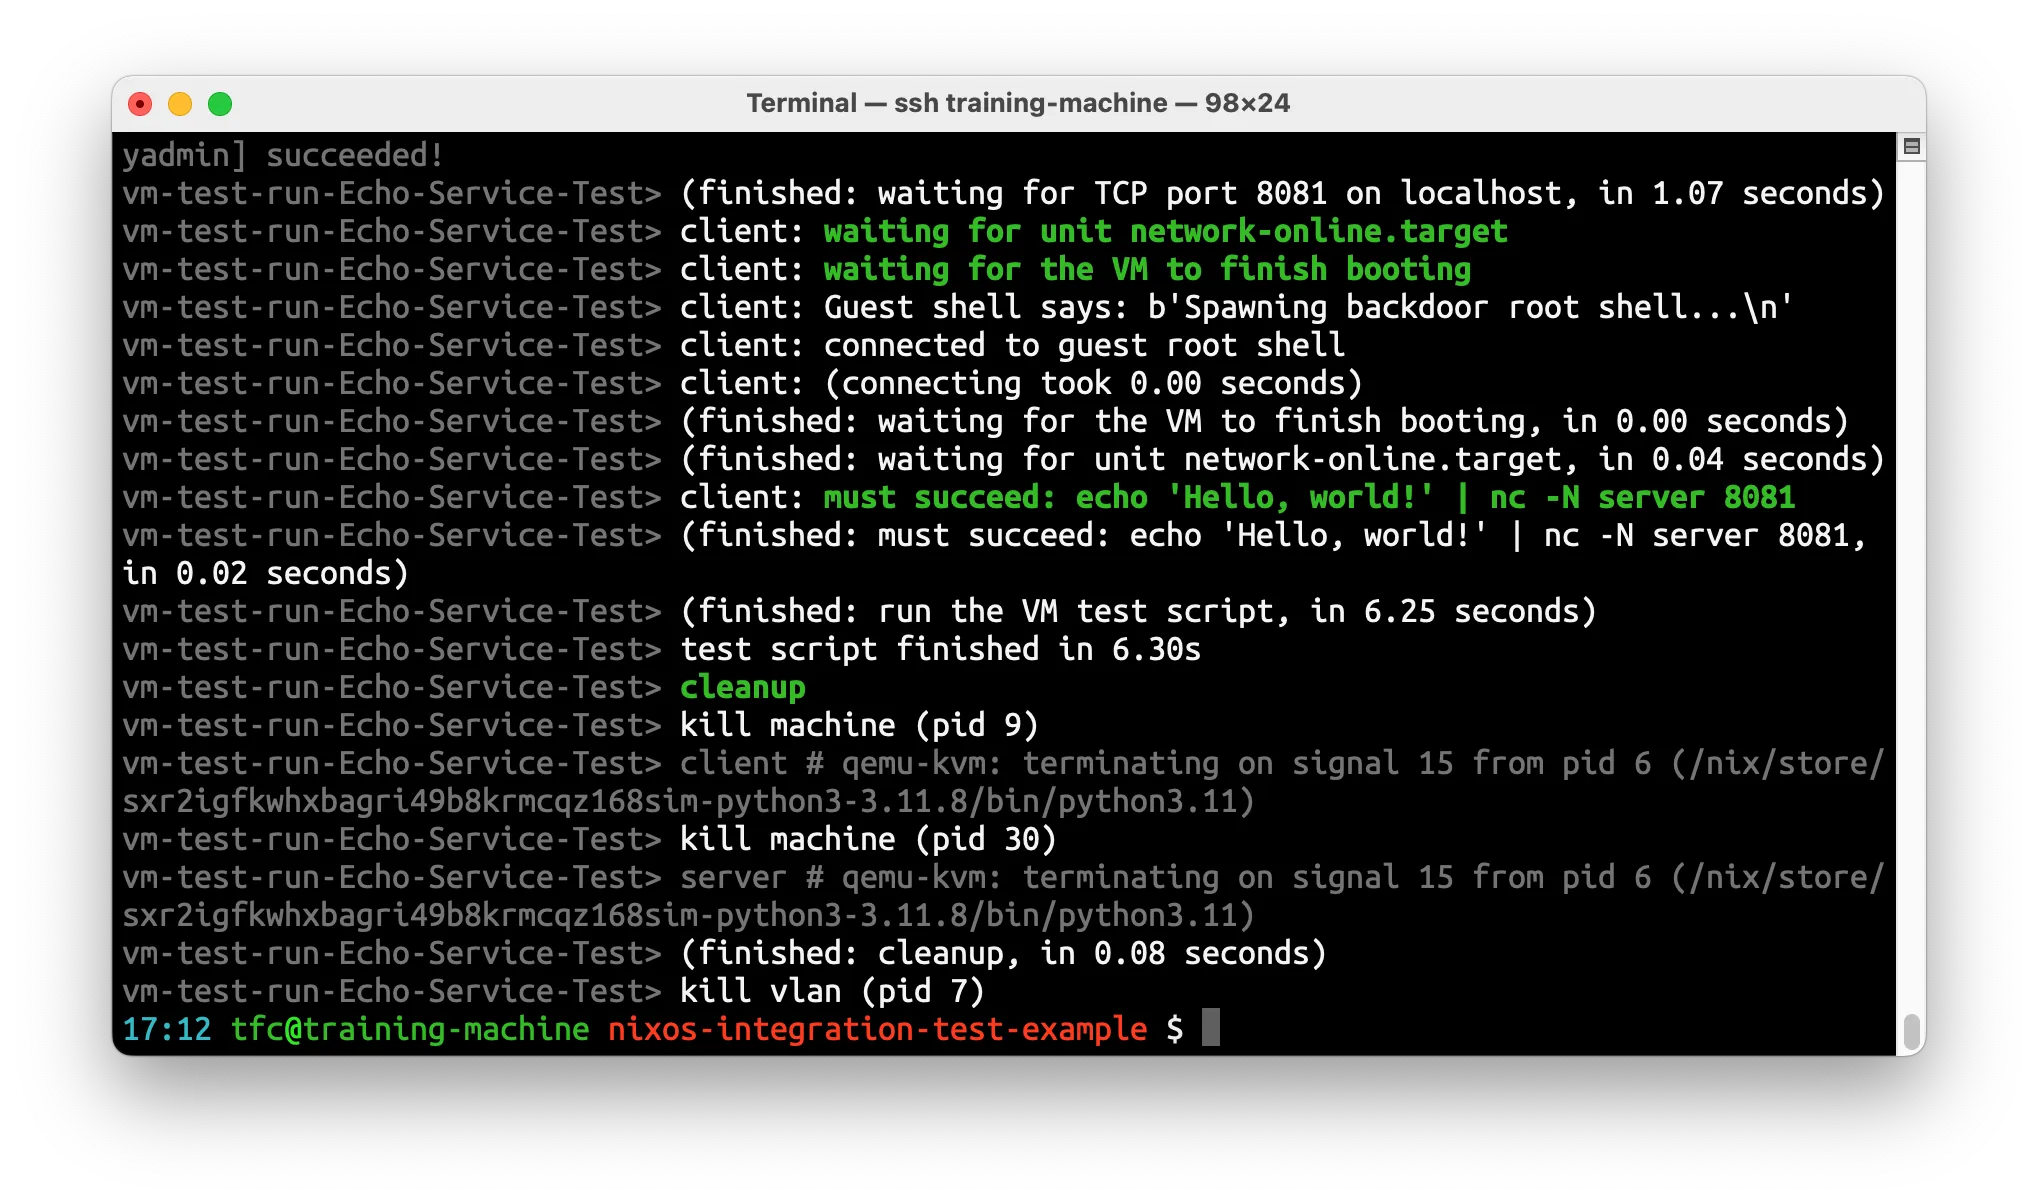
If you checked out the example repo, just run nix -L build .#echo.
If you didn’t check it out, you can still run it directly:
$ nix -L build github:tfc/nixos-integration-test-example#echoThe
-Lflag shows us the whole log output, which is interesting if this is new, as we will see all the boot logs

That was quick!
To see how our test.nix file is called, please have a look at
the project’s flake.nix file.
Step 4: GitHub CI
Being able to test the full product in a customer-like scenario after having performed random changes to the product code is crucial. Imagine an intern or beginner in your company performing innovative changes on your product without being put off by some seniors who say “We can’t risk such changes in the next release”. However, real-life projects pile up many meaningful tests and developers will not run all of them all the time themselves for different reasons.
However, if all the tests are run before every code merge, we can avoid merging broken code. This is typically what CIs are used for.
When using Nix(OS), CIs end up being much simpler than with other technologies. The reason is that running our integration tests in the Nix sandbox just takes a single command on our laptops - and so does it in the CI!
In this article, we concentrate on the free GitHub Action runners as a CI, which
are simply Linux machines (and macOS, but that’s out of scope for this article).
GitLab works, too, but out of the box with their free runners, the experience is
a much slower one.
A GitHub Action YAML file that installs Nix and runs nix flake check looks
like this:
# file: .github/workflows/check.yml
name: CI
on:
  push:
  pull_request:

jobs:
  check:
    runs-on: ubuntu-latest
    steps:
      - uses: actions/checkout@v3
      - uses: DeterminateSystems/nix-installer-action@main
      - uses: DeterminateSystems/magic-nix-cache-action@main
      - run: nix -L flake check
Please note that for
nix flake checkto run all our tests, we added the tests to thechecksattribute in the flake.nix file here.
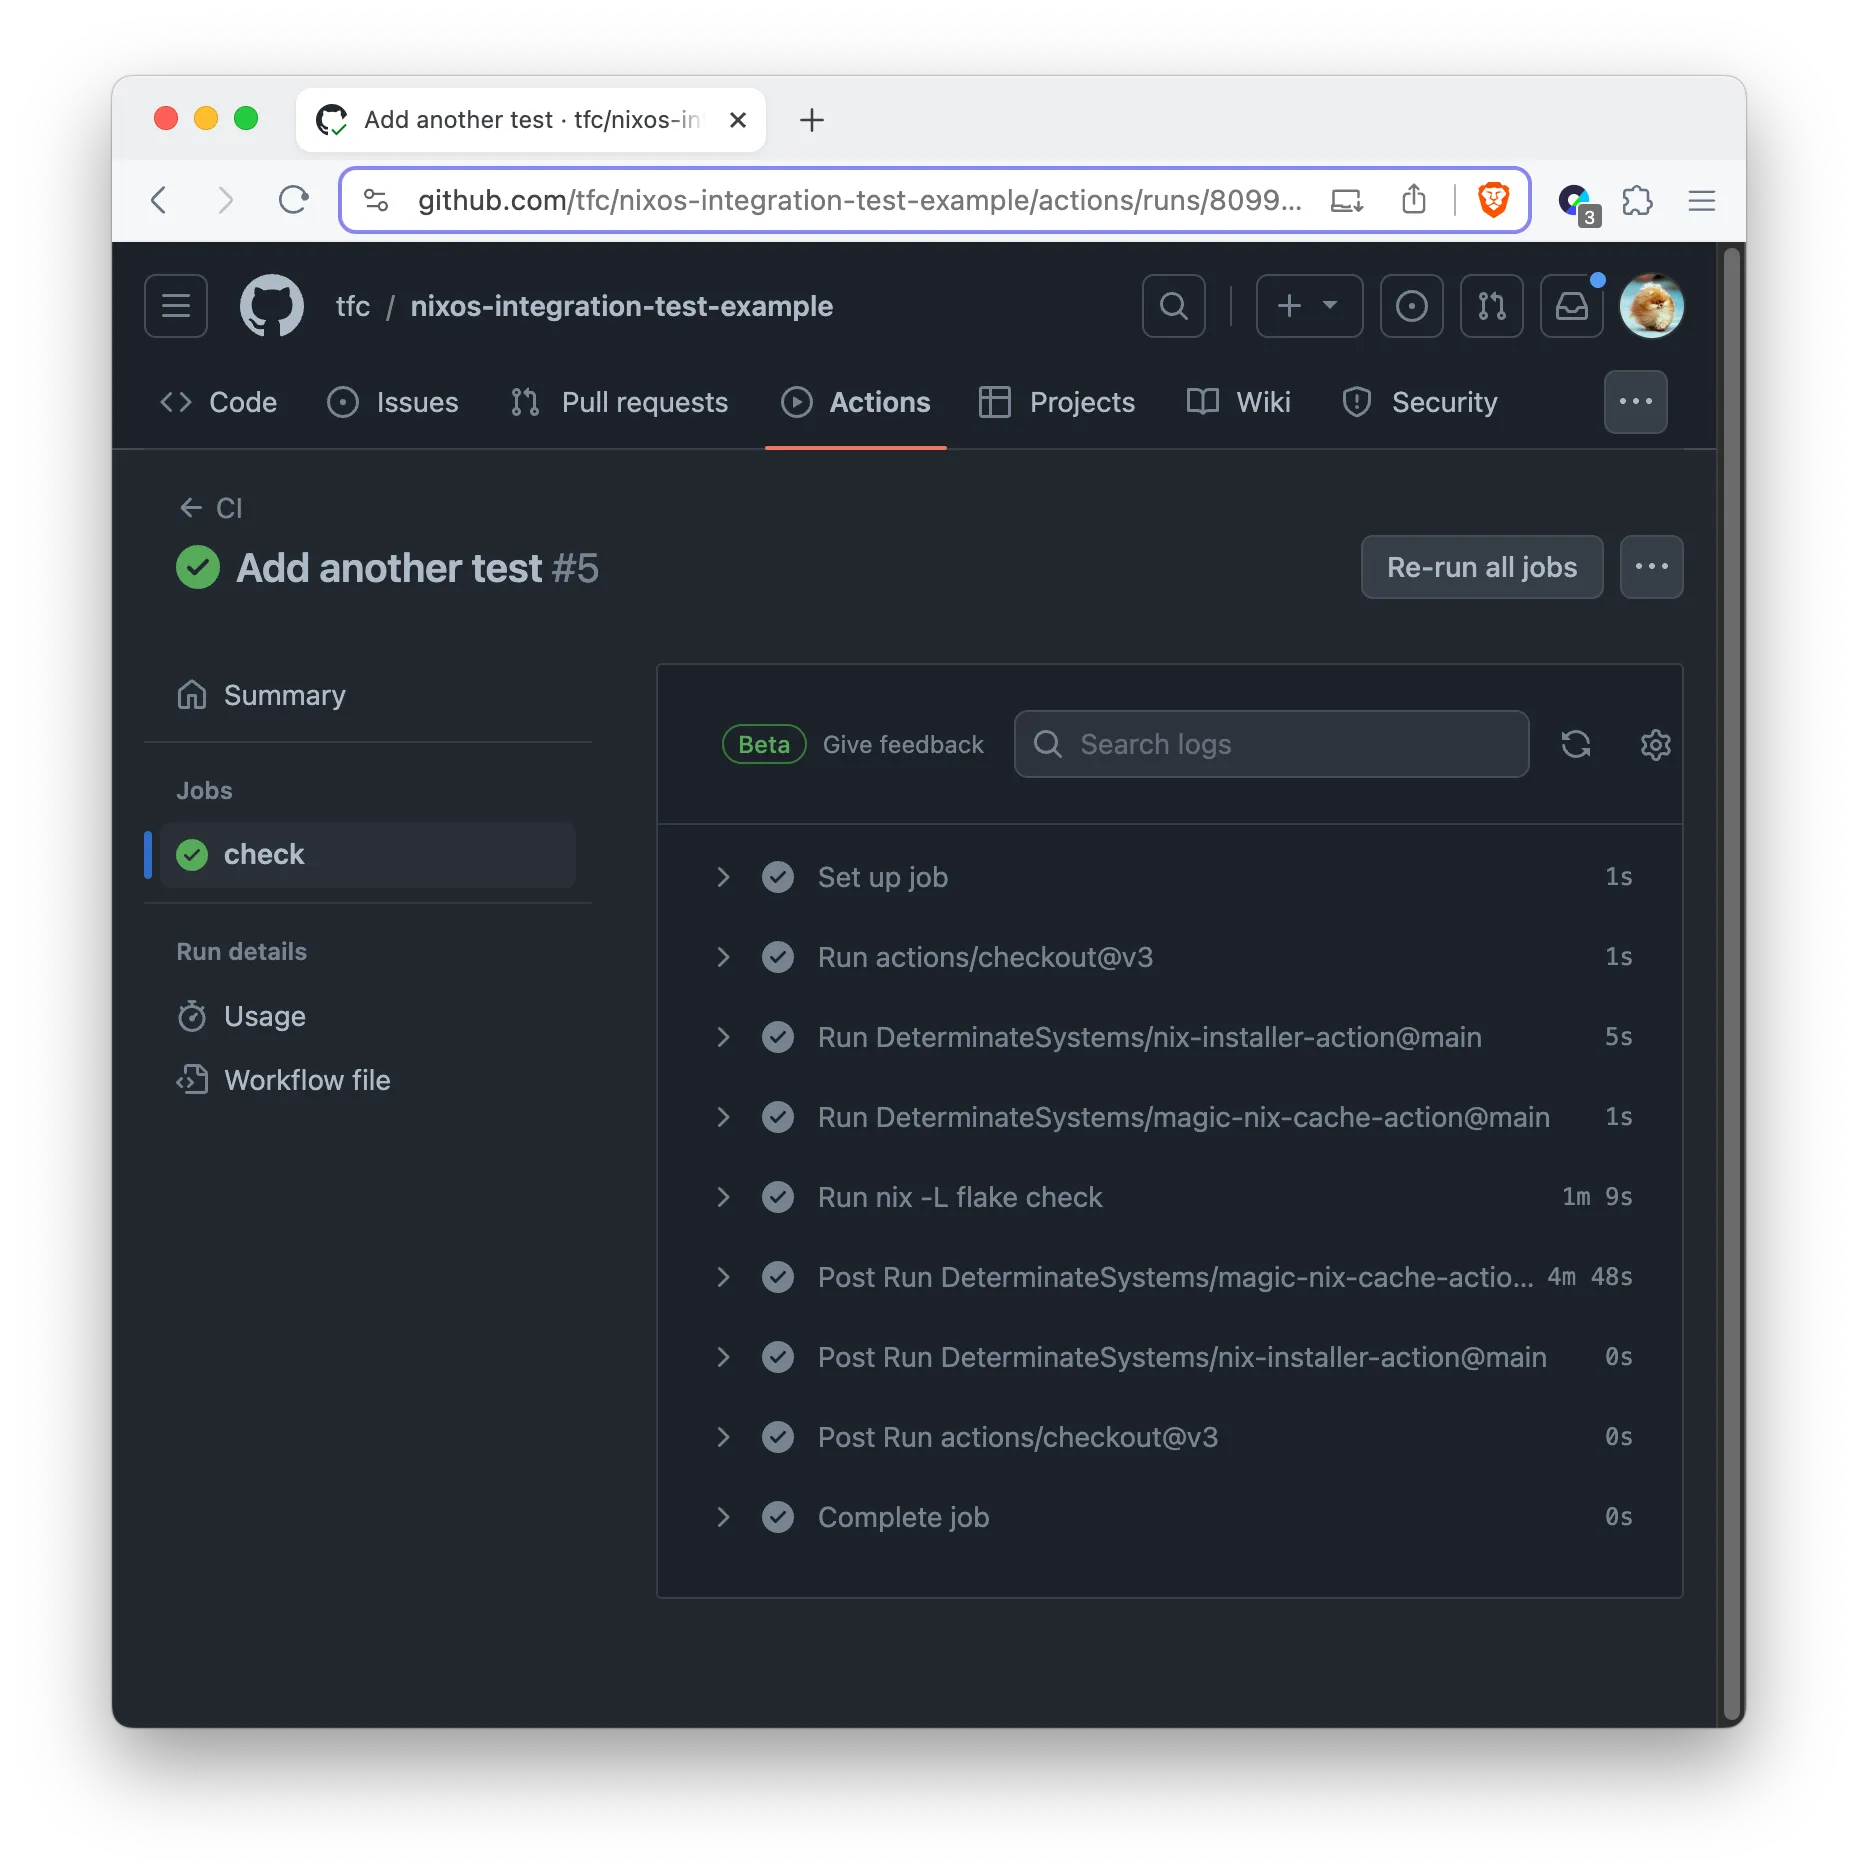
Committing and pushing this file already kicks off the GitHub CI.
The best part about this is that we basically never have to change the CI
description file.
It does not grow in complexity, as all the changes in the future will be led by
the content in the flake.nix file, which is useful for both developers on
their laptops and the CI.
This way, our CI never becomes the single source of truth that breaks in ways
that developers can’t reproduce.

The whole test is very fast, because GitHub Actions support KVM! See also Determinate System’s announcement.
How to Debug Broken Tests?
CI results are very clear when there are only green checkmarks in the overview. But how to find out what’s broken, when there is a failing test?
In my project past, I have seen different end-to-end test infrastructures where the maintainers provide debug hatches for developers in case tests go wrong. This is necessary if a developer can not reproduce a test failure on their laptop. For such situations, the test results, logs, machine state, etc., etc. need to be preserved for further investigation - which makes the infrastructure very complex.
Users of NixOS tests don’t need any of that: If a test fails in the CI, it will fail the same way on a local setup.
The cases where this is not the case are typically slow developer laptops vs. fast CI machines, where tests work a bit differently. Remember in our test where we wait for the
echo.serviceunit to be ready and then we test if the TCP port of the echo service is open? This is an anti-flakiness measure that sometimes appears on slow vs. fast machines.
To make our server VM debuggable, we can add the following to our test.nix
file:
{
  # ...

  interactive.nodes.server = {
    # Enable SSH and passwordless root-login
    services.openssh = {
      enable = true;
      settings = {
        PermitRootLogin = "yes";
        PermitEmptyPasswords = "yes";
      };
    };
    security.pam.services.sshd.allowNullPassword = true;

    # forward the SSH port to the host
    virtualisation.forwardPorts = [
      { from = "host"; host.port = 2222; guest.port = 22; }
    ];
  };

  # ...
}
This configuration snippet will be combined with the nodes.server
configuration that we already wrote, but only if we build and run the
interactive version of the driver like this:
$ nix build .#echo.driverInteractive -- --interactive

# If you didn't check out the project, run this:

$ nix build github:tfc/nixos-integration-test-example#echo.driverInteractive -- --interactive
This command spawns a Python shell that provides all the commands that are also
available in the testScript part of the test.
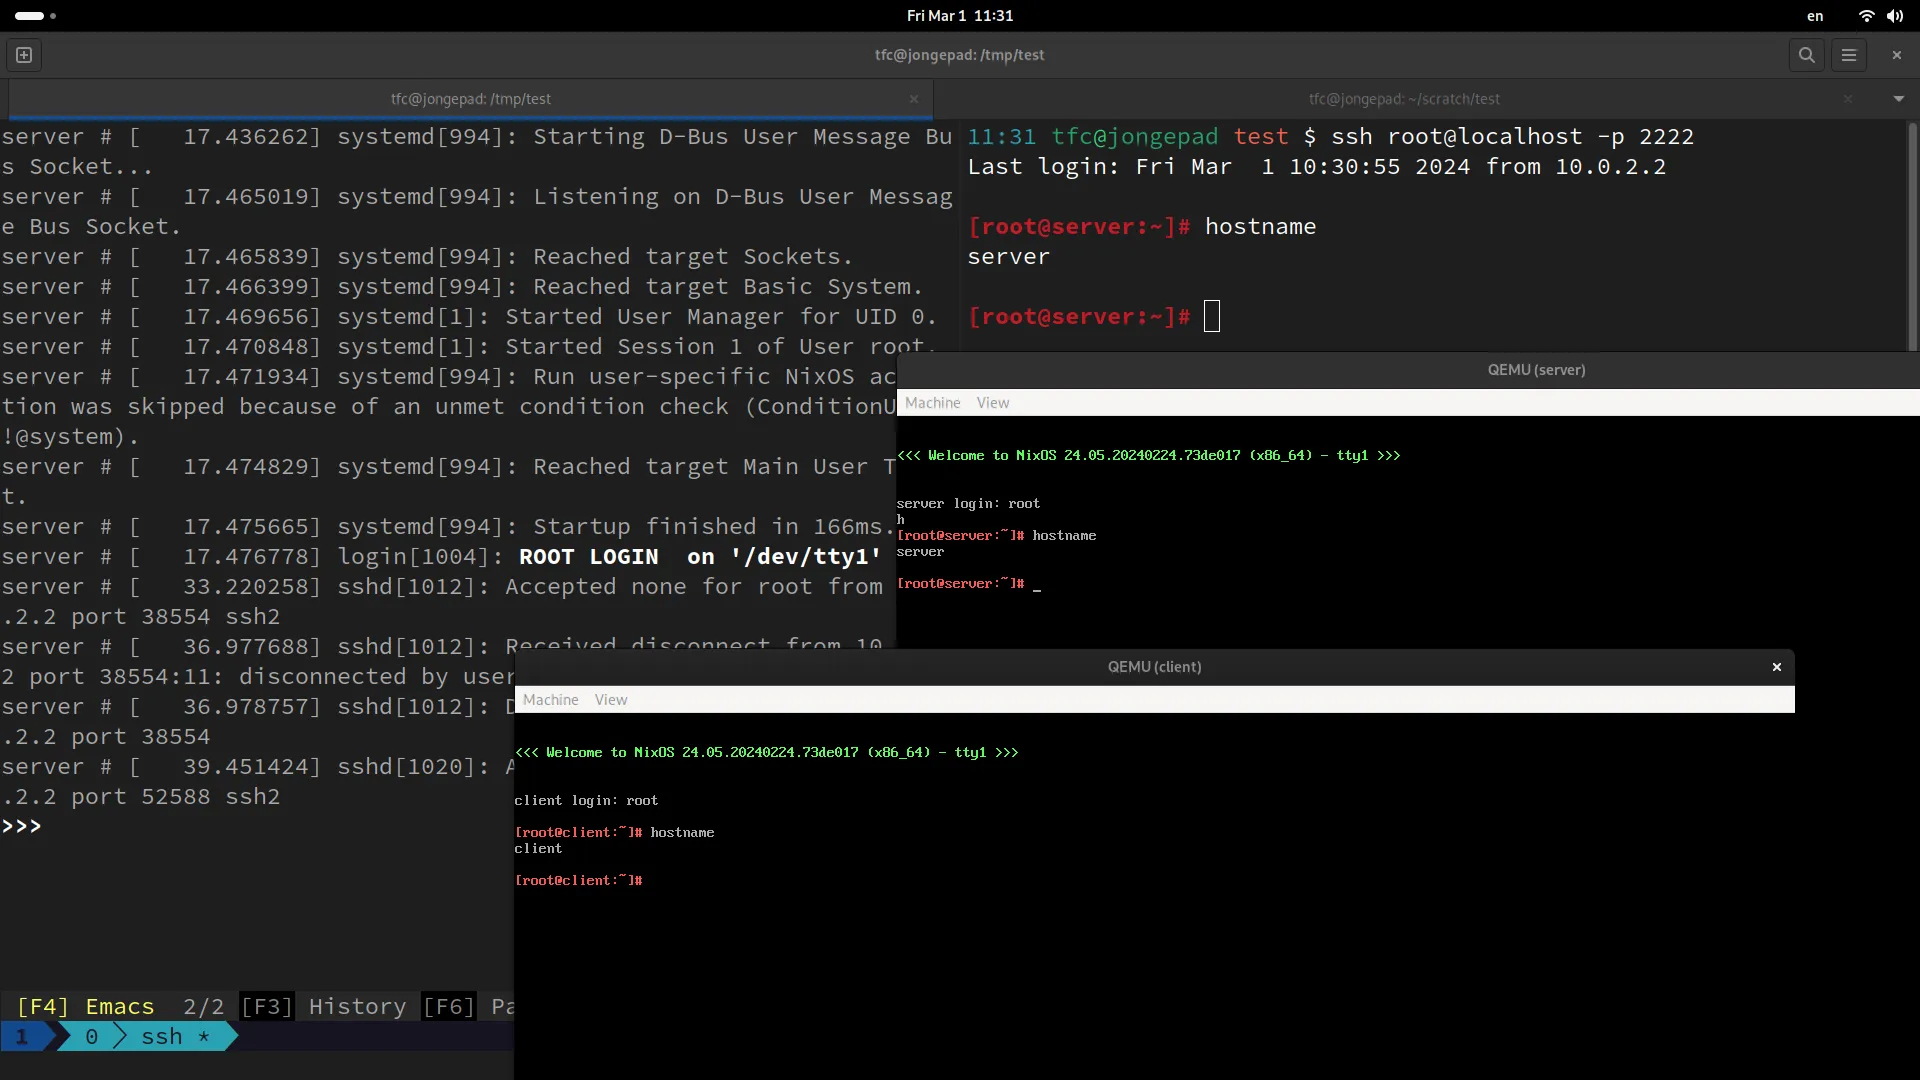
We can now run start_all() and observe how the VM windows are popping up.
In another shell, we can even log into the echo server using
ssh root@localhost -p2222.

This way, we can play with our little test infrastructure locally (or we SSH into a stronger computer if the test has too many VMs for our local hardware) and debug what’s up with our application.
In the interactive.nodes.server configuration, we can also add additional
tools and settings - whatever we need for debugging!
Summary
The NixOS Integration Test Driver offers a powerful platform for conducting comprehensive integration tests, ensuring software reliability across different environments and setups. By integrating these tests into a GitHub CI pipeline, developers can automate the validation of their applications and services, catching potential issues early in the development cycle.
We quickly went through a lot of steps to create and test a simple Python app using NixOS. We showed you how to set it up as a service, how to test it, and how to use GitHub Actions for automatic testing. We know these topics can get complicated.
That’s why there are classes at Nixcademy: They take more time to explain everything, so you can understand better how to fit NixOS into your projects and tight deadlines. If you’re just starting with NixOS and want to learn more about making your projects work smoothly, those classes will shorten your and your team members’ NixOS learning curves by multiple months and take the frustration out of the process. This is especially important when you would like to convince colleagues of Nix who aren’t convinced just yet. In addition to that, you will learn to avoid all the anti-patterns that typically emerge in projects that get going with Nix.
Further links:


