Run NixOS Integration Tests on macOS

Big news: You can now run NixOS integration tests on macOS without any changes to the test! This article helps you set up your Mac and get going.
If this does not appear significant to you, chances are that you haven’t seen
what the NixOS integration test driver is capable of.
In that case, you might want to peek into the article that highlights some of
the most impressive integration tests of NixOS’s nixpkgs repository
and the article about
how the NixOS integration test driver works,
first.
Last week, Gabriella Gonzalez upstreamed changes on nixpkgs that made the NixOS integration test driver finally run on macOS, too. This means that NixOS integration tests still run normal NixOS VMs, but the qemu processes and the Python test driver run natively on macOS.
These changes require the nixos-test and apple-virt capability flags set in
Nix, which is going to be
auto-detected by Nix 2.19 and newer.
Continue to read this article to see how to get it to run on your Mac today.
Setting up macOS for NixOS Integration Tests
Of course, we need to install Nix first. If you haven’t, please have a look at the article about how to install Nix and nix-darwin on macOS.
Then, to run NixOS integration tests on macOS, we need two prerequisites:
- A Linux Builder (Can be a remote Linux machine, or the local
linux-builder) - The
system-featuresNix capability flags neednixos-testandapple-virt(Automatically detected on Nix 2.19 and newer)
The Linux builder could be any remote Linux machine that is configured as a
remote builder or the macOS linux-builder that already comes with nixpkgs.
As we have seen in
the article about the linux-builder,
it is tedious to install it manually but very straightforward to do it with
nix-darwin.
Hence, we strongly suggest configuring
nix-darwin first as explained in this article,
and then coming back to follow the next steps.
The alternative way to configure this without nix-darwin would be manually editing
/etc/nix/nix.confand setting up the Linux builder manually using the steps described in the Linux builder article.
The nix-darwin config snippet that performs both changes looks like this:
# configuration.nix
{ config, pkgs, lib, ... }:

{
  # Run the linux-builder as a background service
  nix.linux-builder.enable = true;

  # Add needed system-features to the nix daemon
  # Starting with Nix 2.19, this will be automatic
  nix.settings.system-features = [
    "nixos-test"
    "apple-virt"
  ];
}
Running darwin-rebuild switch --flake <path/to/my/config> with these added
configuration attributes makes our Mac ready to go.
After everything goes well, we can check if everything is in order:
$ nix show-config system-features
apple-virt apple-virtualization nixos-test

$ sudo launchctl list org.nixos.linux-builder
{
  "LimitLoadToSessionType" = "System";
  "Label" = "org.nixos.linux-builder";
  "OnDemand" = false;
  "LastExitStatus" = 0;
  "PID" = 604;
  "Program" = "/bin/sh";
  "ProgramArguments" = (
    "/bin/sh";
    "-c";
    "/bin/wait4path /nix/store && exec /nix/store/ab8iafqq7x0r13dmsy82q99kddvwrarp-linux-builder-start";
  );
};
We are ready to go. Please note that the default Linux builder settings do not yet provide high performance. To increase the performance of the Linux builder, have a look at the Linux builder article, where we crank them up.
Run an Integration Test
To check if this works, we can now simply run:
$ nix -L build github:tfc/nixos-integration-test-exampleWe can also run one of the other ~700 official NixOS integration tests by running
nix -L build nixpkgs#legacyPackages.aarch64-darwin.nixosTests.login. Please note that some/many of them might not work as macOS support for the test driver is new and they have not been tested on macOS, yet.
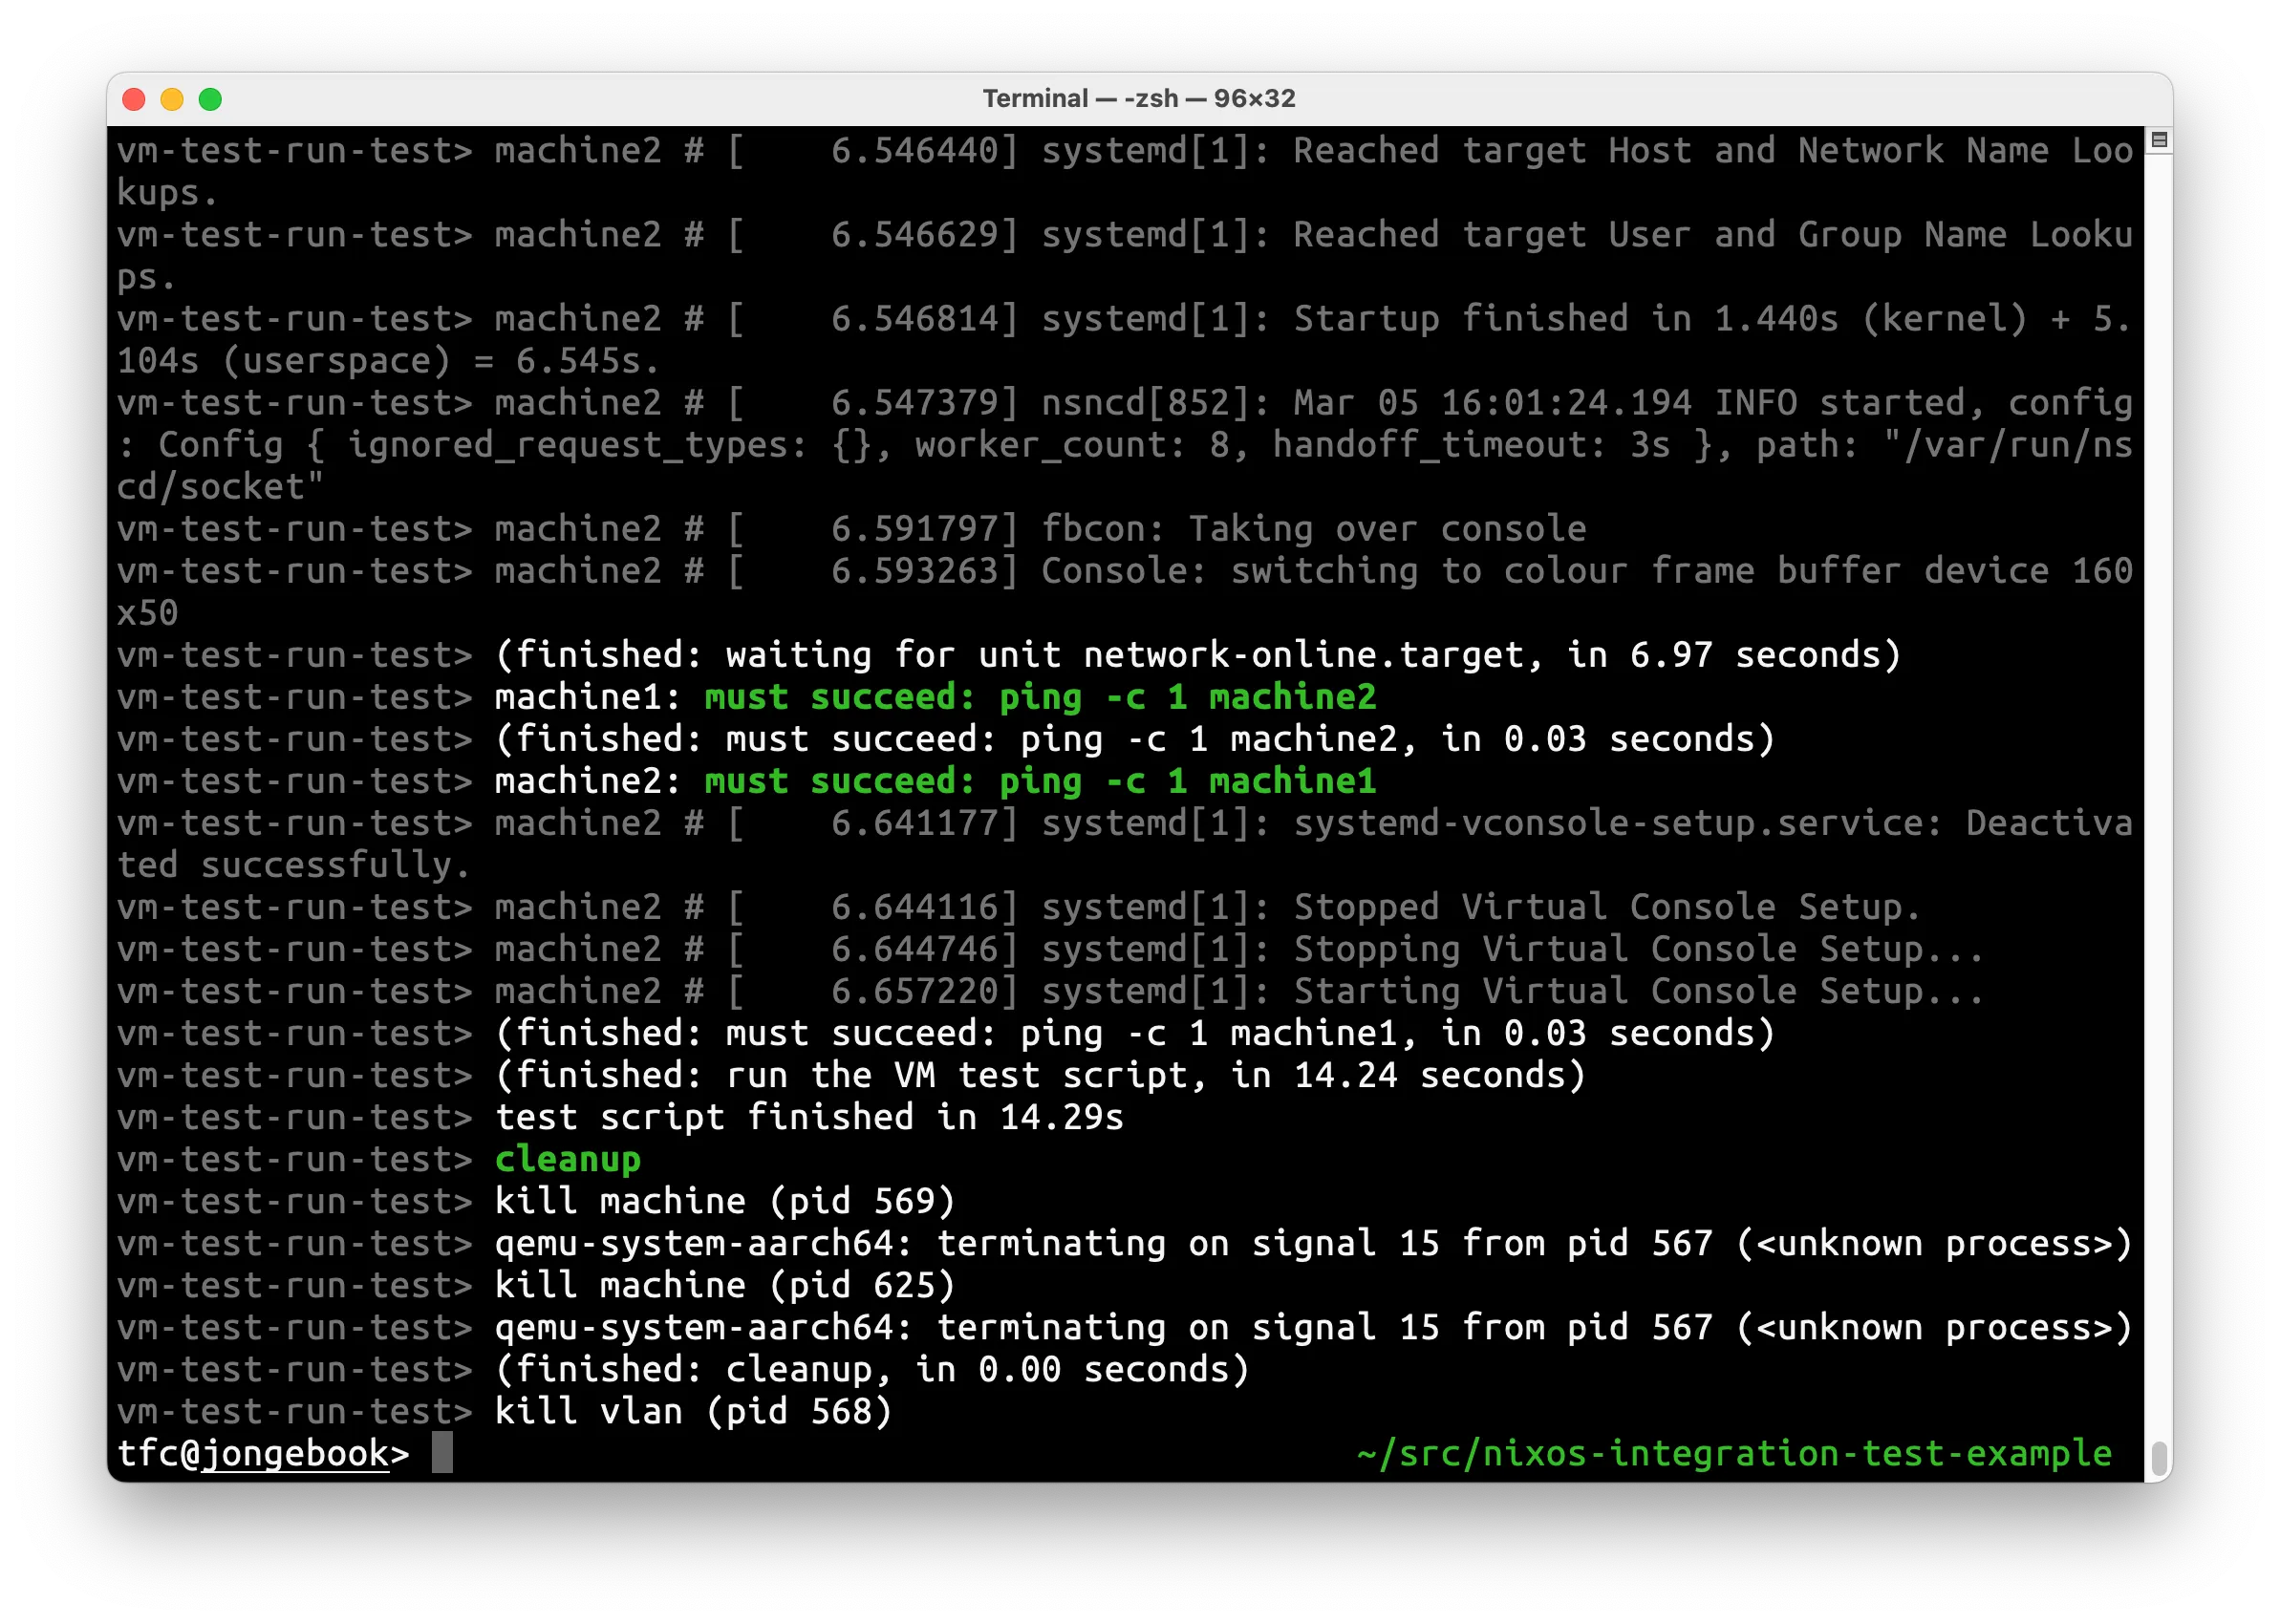
After some download and build time, You will see a lot of Linux boot and service log messages scroll by and end up with the output of a successful test:

For everyone who didn’t have time to study our other NixOS integration test-related articles - this is a little overview of how to assemble your own test to play with it yourself (this is essentially the same test that just ran):
We start with a flake.nix file in our repository that collects all the inputs
and calls a test.nix file.
It doesn’t have to be in a separate file, but the runNixOSTest pattern is most
pleasant this way.
# flake.nix
{
  description = "Example NixOS Integration Tests";

  inputs = {
    nixpkgs.url = "github:NixOS/nixpkgs/nixos-unstable";
    flake-parts.url = "github:hercules-ci/flake-parts";
    flake-parts.inputs.nixpkgs-lib.follows = "nixpkgs";
  };

  outputs = inputs: inputs.flake-parts.lib.mkFlake { inherit inputs; } {
    systems = [
      "x86_64-linux" "aarch64-linux" "aarch64-darwin" "x86_64-darwin"
    ];
    perSystem = { config, pkgs, ... }: {
      packages.default = pkgs.testers.runNixOSTest ./test.nix;

      # put the packages into `checks` so `nix flake check` runs them, too
      checks = config.packages;
    };
  };
}
The test.nix file describes our test name, the VM network, and finally also
the actual test:
# test.nix
{
  name = "An awesome test.";

  nodes = {
    machine1 = { pkgs, ... }: {
      # Empty config sets some defaults
    };
    machine2 = { pkgs, ... }: { };
  };

  testScript = ''
    machine1.systemctl("start network-online.target")
    machine2.systemctl("start network-online.target")
    machine1.wait_for_unit("network-online.target")
    machine2.wait_for_unit("network-online.target")

    machine1.succeed("ping -c 1 machine2")
    machine2.succeed("ping -c 1 machine1")
  '';
}
With these two files in a local folder, we can simply run nix -L build to run
the test.
I suggest the -L parameter in the beginning because the log output is
interesting to watch while discovering what the NixOS integration test driver is
capable of.
What do do from here? Read part 1 and part 2 of our article series on the NixOS integration test driver to get a taste of what it is capable of. Then, have a look at the NixOS integration test driver documentation. Have fun!
Debugging Mode
What to do when a test fails? Change something, watch complex minutes-running tests run from beginning to end all over again and again, and hope that the latest change finally fixes it? Surely not.
Debugging our Integration tests, as demonstrated in the last article, works right out of the box.
We can run the NixOS integration test driver outside of Nix in the interactive mode:
$ nix run .#echo.driverInteractive -- --interactive
warning: Git tree '/Users/tfc/src/nixos-integration-test-example' is dirty
Machine state will be reset. To keep it, pass --keep-vm-state
start all VLans
start vlan
running vlan (pid 3680; ctl /tmp/vde1.ctl)
(finished: start all VLans, in 0.00 seconds)
additionally exposed symbols:
    machine1, machine2,
    vlan1,
    start_all, test_script, machines, vlans, driver, log, os, create_machine,
    subtest, run_tests, join_all, retry, serial_stdout_off, serial_stdout_on,
    polling_condition, Machine
>>>
In the Python shell, we can use any of the functionality of the integration test driver (see also the documentation).
The test definitions in the
example repository from the last article
contain additional configuration that is only active in the interactive mode.
With that, the server VM of the echo test (same repo) for example, is also
reachable via SSH on the host port 2222, as shown in this screenshot:

This way we can avoid having the full test run again and fail. Instead, we discover what works on the running interactive VMs.
Troubleshooting
If you ever come across this problem when trying to run a NixOS test on macOS:
$ nix -L build github:tfc/nixos-integration-test-example
error: Nix daemon disconnected unexpectedly (maybe it crashed?)
error: builder for '/nix/store/0gqsjvdr1jyc8i44qisijicrqwmgdfpp-append-initrd-secrets.drv' failed with exit code 1
error: 1 dependencies of derivation '/nix/store/mis8qwr0zgdfki8zd4chz5kcwmbv9xn5-nixos-system-machine1-test.drv' failed to build
error: 1 dependencies of derivation '/nix/store/231p5kab86f7awsmq6cx7zjql5yng8ap-nixos-system-machine2-test.drv' failed to build
error: 1 dependencies of derivation '/nix/store/fx44l2g733jq3i53zfdvgkydj0ayjc0k-nixos-vm.drv' failed to build
error: 1 dependencies of derivation '/nix/store/s06l5w4f26b9919f1db3s9xx3vxk5rvm-nixos-test-driver-An-awesome-test..drv' failed to build
error: 1 dependencies of derivation '/nix/store/mzpa0a37n5p03q9q1sazjrbljvcq1l2g-vm-test-run-An-awesome-test..drv' failed to build
The reason might be that the SSH connection to the linux builder does not work. To debug this further, try to log into the linux builder via SSH from the root user account on your mac:
$ sudo ssh linux-builder
Last login: Sun Feb  9 08:23:59 2025 from 10.0.2.2

[builder@nixos:~]$
We have seen cases where this did not work immediately because e.g. the linux builder’s host key was unknown yet and had to be accepted manually. This should happen automatically in a vanilla setup but users sometimes have diverging SSH configurations that impede the default behavior.
Summary
Being able to build Linux systems and also test them in the NixOS integration test driver on macOS is a big enabler. This is especially true in the corporate context where the big IT departments supply employees with either Windows laptops or Macs.
The VMs are a bit slower on macOS, but with more users and some debugging, this performance difference will most probably vanish over time.
Are you interested in unlocking this power at scale in your corporate environment? We helped many companies get up to speed with Nix by both training teams and setting up Nix build and cache infrastructure in ways that fit into the existing IT landscape. We have helped companies win with Nix and know what the winning setups look like. Schedule a free call with us today!


